FAQ

For Non-users

General

G1. How to get Bookopedia?

Bookopedia is available on iOS 16+. You can download it here for free: AppStore.


G2. What languages are supported?

Bookopedia's interface is available in English and French. You can add books in any language. Don't hesitate to contact us if you want to see another language supported or if you simply wish to help us.


G3. Can I import a list of books?

Yes! It is possible to import a csv file containing a list of books as long as you provide a title and an author columns.

Even better, Bookopedia facilitates the importation of your data from Goodreads, The StoryGraph, Calibre and BookBuddy. If you wish to see the support of another service, send us an email. We will gladly look into it.


G4. Can I import a list of quotes?

Sure thing! You can import a csv file containing a list of quotes.
For Users

Books

B1. How to edit a book's info?

You have 2 ways to open the edit form of a book.

  • Option 1

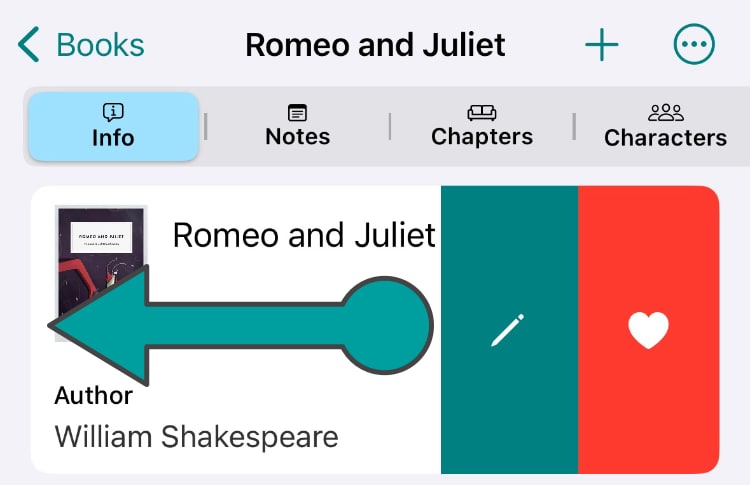
    Swiping to the left on the first block of section Info of a book reveals the edit button as well as the favorite toggle button

    Open a book, go to the section "Info", then swipe to the left on the first block. An edit button with a pencil icon will appear. Tap it.

  • Option 2

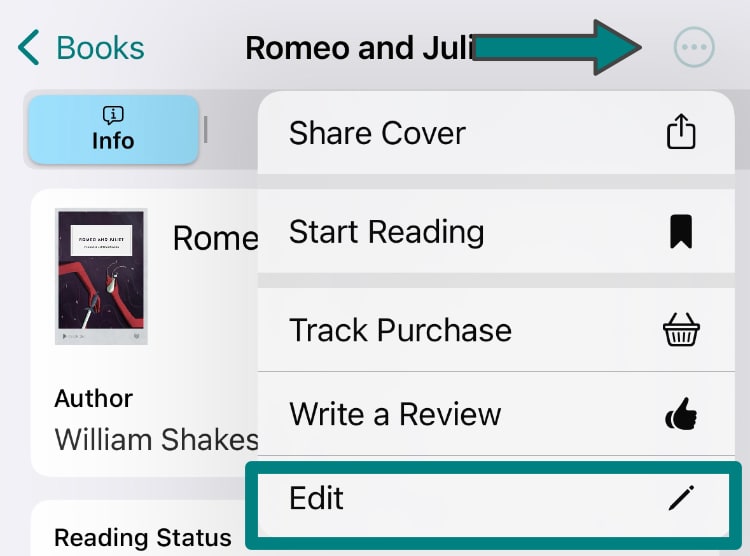
    Tapping the top right button of section Info of a book reveals a menu with the edit button.

    Open a book, go to the section "Info", then tap the top right button with the "..." icon. It will reveal a menu whose last button is "Edit".


B2. How to add a cover to a book?

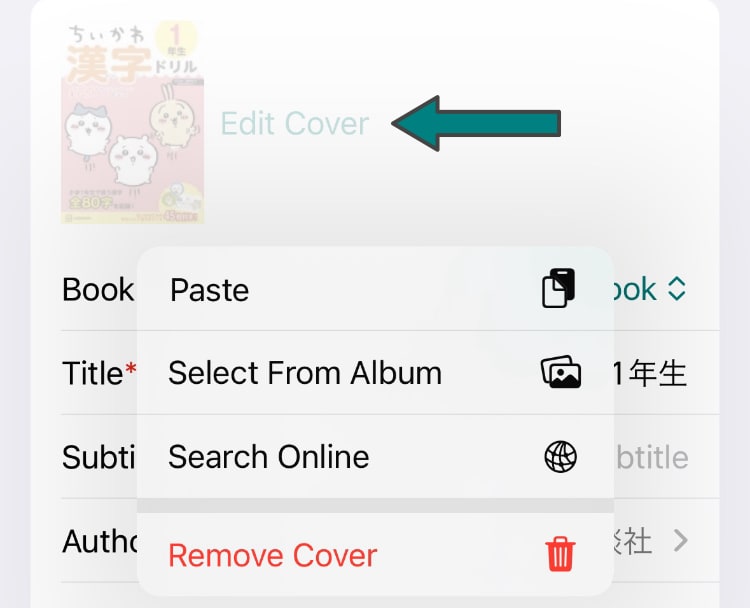
You have 3 ways to add a cover to a book. First you need to edit a book (see question B1. for help). Then tap on "Edit Cover" as shown on the following screenshot.
Start editing a book then tap on Edit Cover

  • Option 1

    Copy an image from anywhere (web browser, messaging app, etc). Then tap "Paste".

  • Option 2

    By tapping "Select From Album", you can import your own cover.

  • Option 3

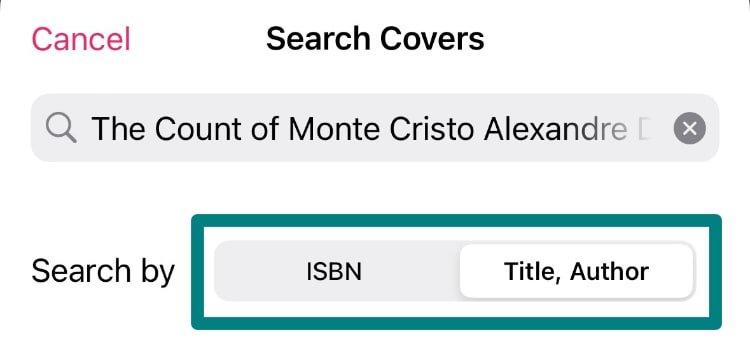
    How to search for a cover online by using either the ISBN or the book's title

    With "Search Online", Bookopedia will try to find the right cover from internet. By default, it will try to search using the ISBN (if provided), this method usually gives better results. However, if the book doesn't have an ISBN, you can enter the title and the author's name.


B3. How to track purchases?
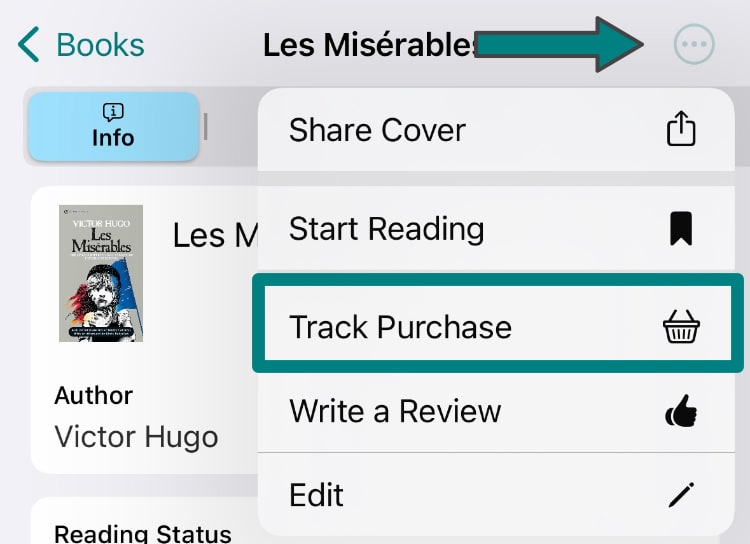
  • Tap the top right button then tap Track Purchase

    Open a book, go to section "Info" and tap the top right "..." button. Then tap Track Purchases. You can then define the purchase date, the purchase place and the book's price.


B4. How to track progress?

You have 4 ways to track progress of a book.

  • Option 1

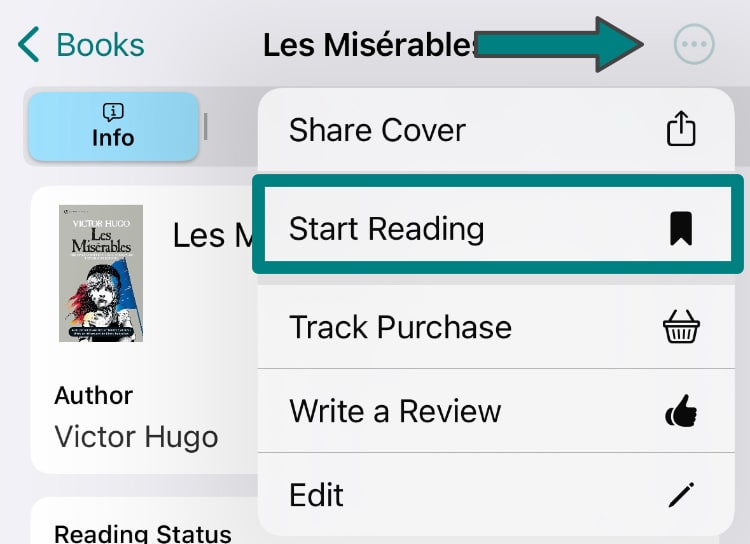
    Tap the top right button then tap Start Reading

    (Only available for unread books)
    Open a book, go to section "Info" and tap the top right "..." button. Then tap Start Reading. This will automatically track today as the starting day.

  • Option 2

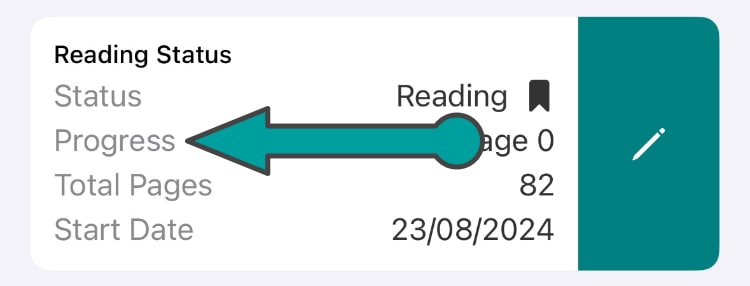
    Swipe the reading status block to track progress

    Open a book, go to section "Info" and go down to the "Reading Status" block. Then swipe to the left to reveal an edit button.

  • Option 3

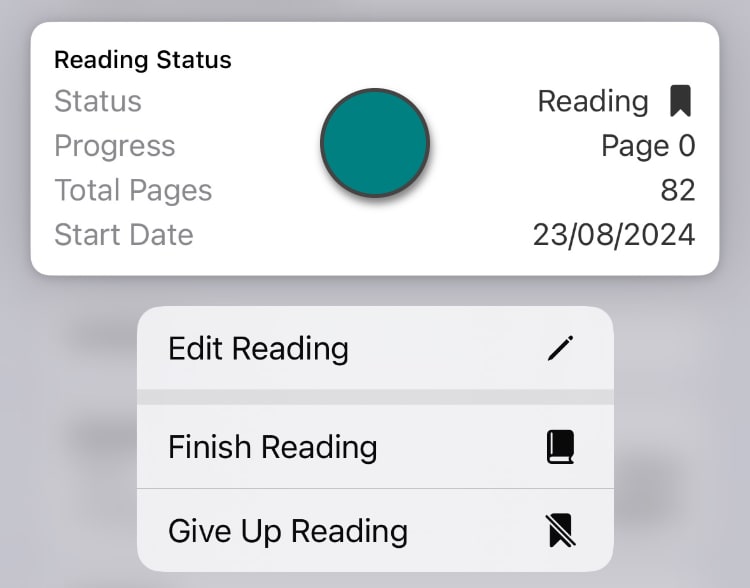
    Long tap the reading status block to reveal an edit menu

    Open a book, go to section "Info" and go down to the "Reading Status" block. Then long tap the block to reveal an edit menu.

  • Option 4

    Open a book, go to section "Info" and edit it (See question B1. for help).
    By the end of the edit form, you will find a section related to the reading status.


B5. How to handle multi-content (short stories, poems, single complete volume...) books?

Do you have a multi-content book such as a collection of short stories, a book of poems or a single volume book? Would you like to independently note and review them?
You have 2 ways to set the multi-content type.

  • Option 1

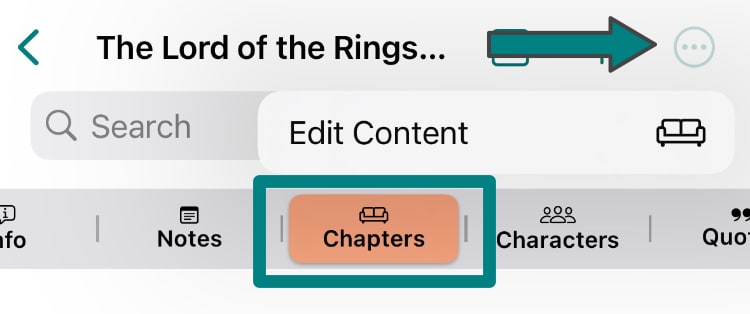
    Open a book, go to the Chapters tab, then tap the top right button to reveal an Edit Content button

    Open a book, go to section "Chapters" and tap the top right "..." button to reveal an "Edit Content" button.
    A sheet will appear. You can rename the multi-content type. You can also disable the feature altogether for the current book.

    NOTE: If you disable this feature and wish to re-enable it, refer to the steps explained in the following Option 2.

  • Option 2

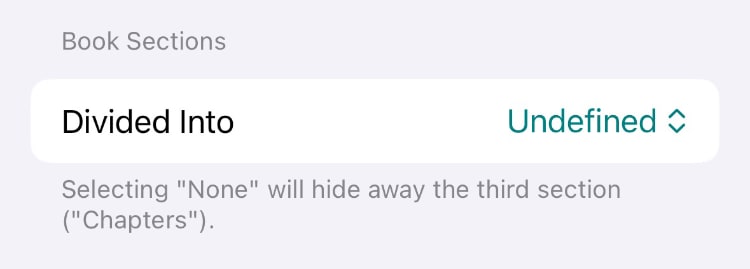
    Open the add or edit book form, scroll down until you find Book Sections

    Open the "Add Book" form or the "Edit Book" form. Scroll down until you find "Book Sections > Divided Into". You can now select the content type.

    NOTE: If you select "None", the entire section related to multi-content will disappear from the current book. You can always re-enable it by changing it back to another value.

Book Sections

BS1. How to reorganize the sections "Info, Notes, Chapters, Characters, Quotes..."?
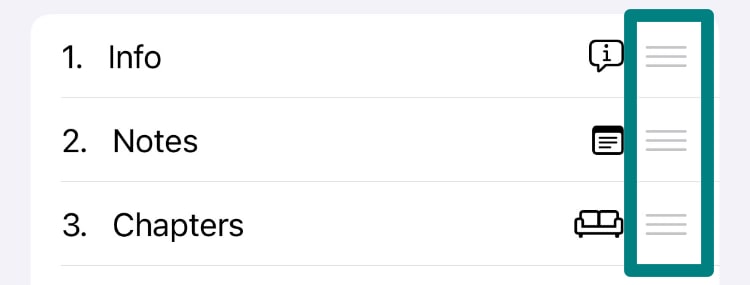
  • Drag and drop the icon with the 3 horizontal lines to re-order sections (from Settings > Book Sections > Order Sections)

    Go to the Settings tab, then open Books > Books Sections. On the next screen, select Order Book Sections. You can now drag and drop the sections using the 3 horizontal lines on the right side.


BS2. How to move the placement of sections "Info, Notes, Chapters, Characters, Quotes..."?
  • Go to the Settings tab, then open Books > Books Sections. On the next screen, tap Placement and select your position.

Notes

N1. What is Markdown?

Markdown is a markup language for creating formatted text. In order words it transforms something like **Bold text** into Bold text. You can learn more about Markdown on this website: Markdown Tutorial.


N2. How to activate Markdown support?

Go to the Settings tab, then open Books > Books Notes. On the next screen, you will be able to activate "Use Markdown". This feature is only available for the Notes section.

Quotes

Q1. How to add quotes from physical books faster?

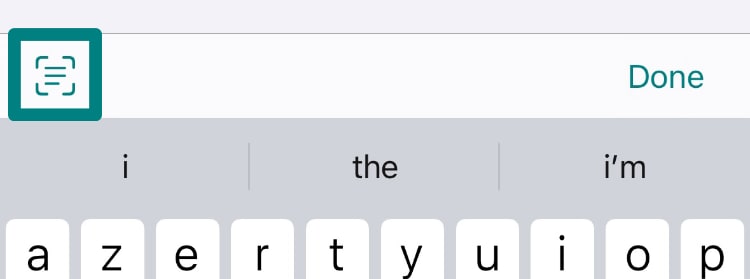
An OCR shortcut icon will appear at the top-left of the keyboard view.

You can access the OCR feature faster when adding a quote, thanks to the shortcut on the top-left of the keyboard window (cf. the picture above).
The icon represents the OCR feature with lines of text surrounded by a camera frame.

If you need more info about OCR, refer to questions TS1, TS2 & TS3.

NOTE: The icon will only appear if you have activated "Live Text" from your phone settings. Refer to TS1 to learn how to activate it.

Text Scanning (OCR)

TS1. How to scan text from a physical book?

iOS offers OCR (short for Optical Character Recognition) out of the box for any device with a neural engine processor (starting from iPhone X).
It is possible to use your device's camera to copy text from a book then paste it anywhere on Bookopedia.
For the following example, let's try to add a note using the OCR feature.
NOTE: This feature is globally available on your device. You can use it with Mail, WhatsApp, Messages and all your other applications.

  • Step 1

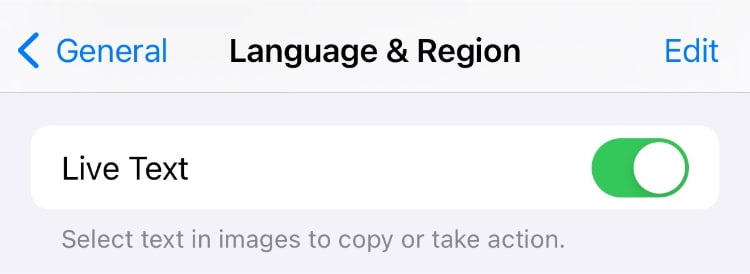
    Activating Live Text from the device Settings > General > Language & Region

    Activate the option from your phone's Settings. You can follow the official instructions here: Apple help.
    Open Settings > General > Language & Region.
    Then turn on "Live Text".

  • Step 2

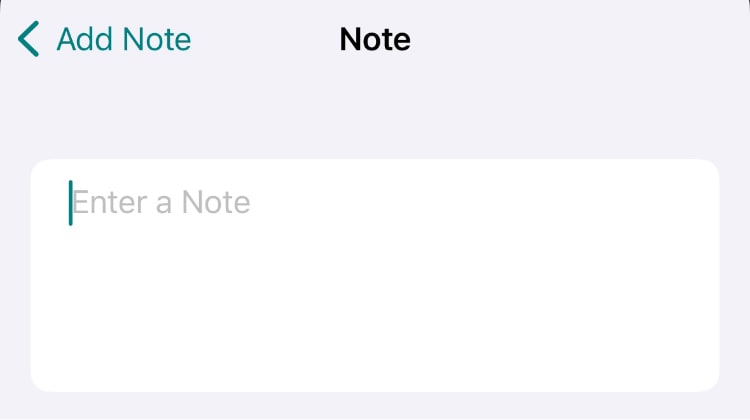
    The text editor of a Note form.

    Open a book, go to the "Notes" section of the book.
    Add a note by tapping the "+" button at the top-right.
    Tap the "Note" line to open the text editor.

  • Step 3

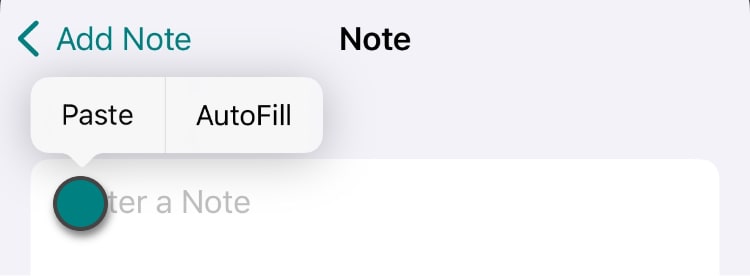
    The tap where the cursor is to open a contextual menu.

    Open the contextual menu of the editor by tapping where the cursor is.
    NOTE: It is the same contextual menu as when you want to copy-paste text.

  • Step 4

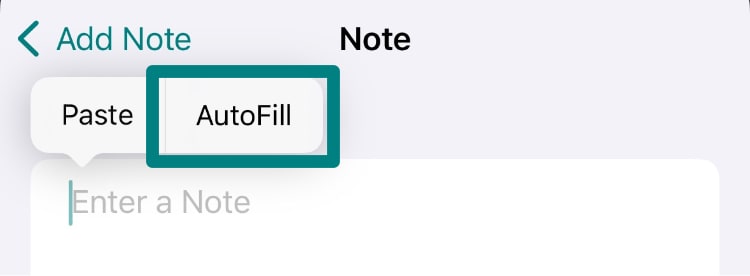
    Tap the AutoFill option.

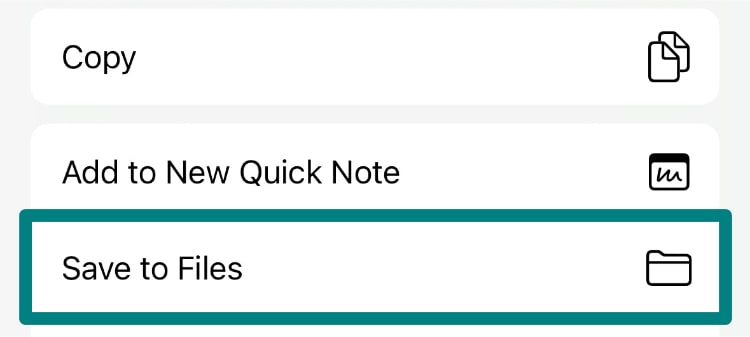
    You should see the option "AutoFill". Tap it to start the OCR process.
    NOTE 1:If AutoFill doesn't appear, it means that you didn't activate "Live Text" on your device's settings as mentionned in Step 1.
    NOTE 2: If you see a right arrow surrounding the contextual menu and AutoFill doesn't appear at first, it might be located further down the menu. You need to tap the right arrow (or swipe to the left).


TS2. How to use the OCR feature? (Method 1: Complete capture)

You have 2 ways of capturing text from your device's camera: "Complete“ capture and "Selected" capture. This question will cover the first method: "Complete".
NOTE: We will assume that you have already opened the OCR feature. Otherwise refer to question TS1.

  • Method 1: Complete capture

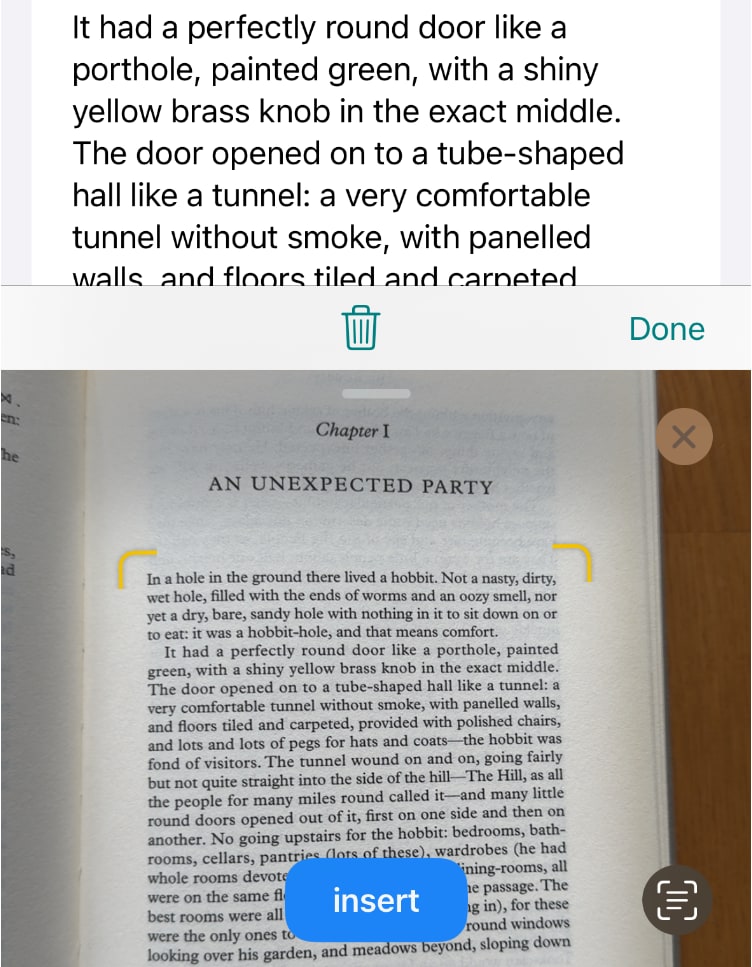
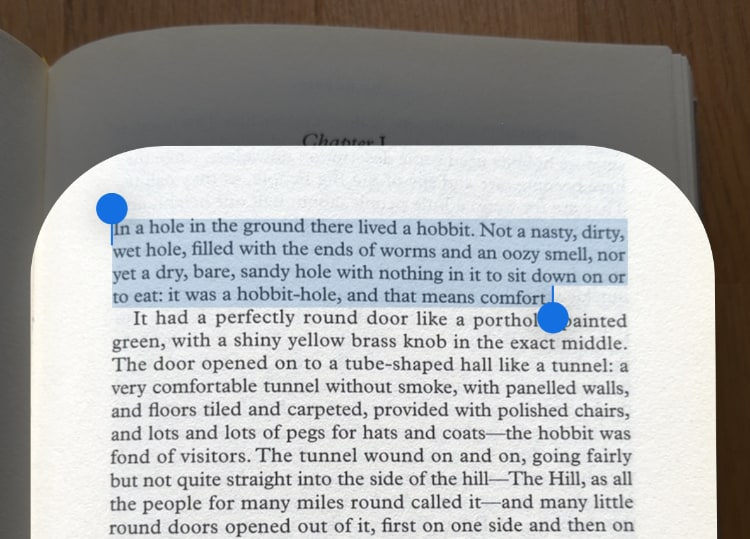
    The OCR interface

    With your phone, target the page you want to scan. You should see an interface similar to the picture above.

    • Step 1 (Optional)

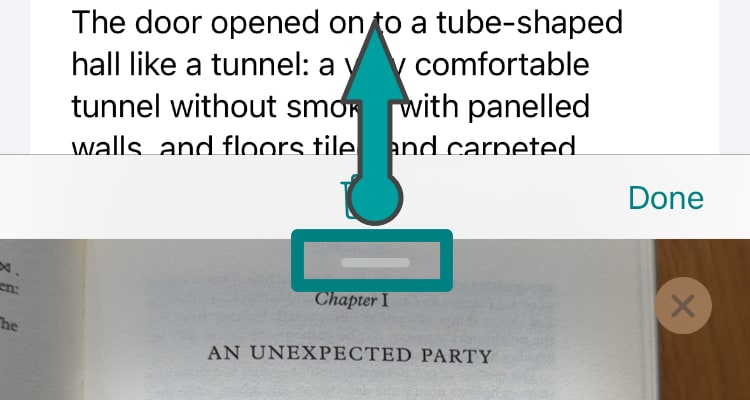
      Expand the OCR Window

      You can expand the OCR window by dragging to the top a tiny translucent bar as shown on the above picture. Expanding the OCR window will make everything easier to handle.

    • Step 2

      Using its neural engine, your device will try to scan text in real time.
      Don't hesitate to move a little bit the book until the device captures exactly what you want.
      NOTE: A good lighting and a stable hand will improve the success of the text recognition.

    • Step 3

      Tap the "Insert" button at the bottom to capture the text and quit the OCR mode.


TS3. How to use the OCR feature? (Method 2: Selected capture)

This question will cover the second method: "Selected".
NOTE: We will assume that you have already opened the OCR feature. Otherwise refer to question TS1.

  • Method 2: Selected capture

    The OCR interface

    With your phone, target the page you want to scan. You should see an interface similar to the picture above.

    • Step 1 (Optional)

      Expand the OCR Window

      You can expand the OCR window by dragging to the top a tiny translucent bar as shown on the above picture. Expanding the OCR window will make things easier for the next steps.

    • Step 2

      Tap the bottom right icon to open the selection popup. Some text must be detected to make the icon appear.

      At the bottom-right, you will see an icon of a lines surrounded by a camera frame.
      By tapping it, it will freeze the current image and open a dedicated popup to allow you to select text.
      NOTE: The button will only activate if the camera has detected text, otherwise it won't display.

    • Step 3

      Select the text you want to scan the same way you would select text in any other app.

      Select the text you wish to scan, the same way you would select text in any other app.
      Once you are satisfied with the result, tap the final button "Insert" at the bottom. It will automatically close the OCR window.
      NOTE: Sometimes, the neural engine might fail halfway. In such case, you will need to restart from Step 1.

      IMPORTANT: Because the camera is constantly scanning for text, there might be a detection conflict between what you are selecting and the ongoing camera scanning. If such is the case, you won't be able to tap "Insert".
      It is suggested that once you freeze the text (when the popup appears), you move the camera away so that it won't try to scan for additional text.

Vocabulary

V1. How to add a complete vocabulary entry with its definitions, quote examples, synonyms?

You have 2 ways to add a vocabulary entry. Either from the "Vocabulary" bottom main tab or from the "Vocabulary" tab within a book.

  • Step 1

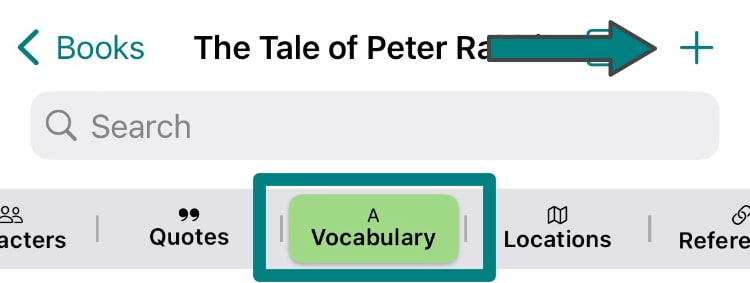
    Open the Vocabulary tab, tap the top right plus button

    Tap the top right + button from either the main Vocabulary tab or the book's Vocabulary tab.

  • Step 2

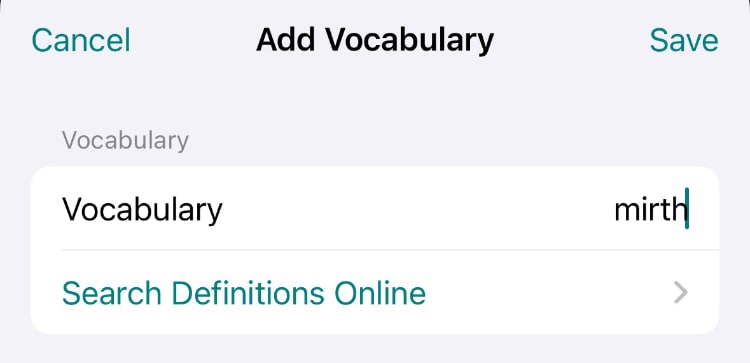
    Enter a term on the first text input

    On the first text field, enter a term (expression, word, anything you want).
    NOTE: It is highly recommended to write common nouns in lowercase and proper nouns with a capital letter, as you would find them in an official dictionary.

  • Step 3 (Optional)

    Below the Vocabulary input field, you might see a button Search Definitions Online. This feature allows you to retrieve the definitions from Wiktionary. Upon finding the definitions, you can select the ones that you wish to save, then tap the top-right button "Save".
    NOTE: This is currently only available for English, French, Russian and Spanish entries.
    Bookopedia offers multiple places to set a language. To determine the language used, the "Search Definitions Online" will look up, by priority:

    1. Vocabulary language (can be set on the Vocabulary form)
    2. Book language (can be set on the Book form)
    3. Settings > Default Book Language
    4. Your device language

  • Step 4

    Add a definition or select an existing definition to edit it.
    You can associate synonyms to each definition.

  • Step 5 (Optional but recommended)

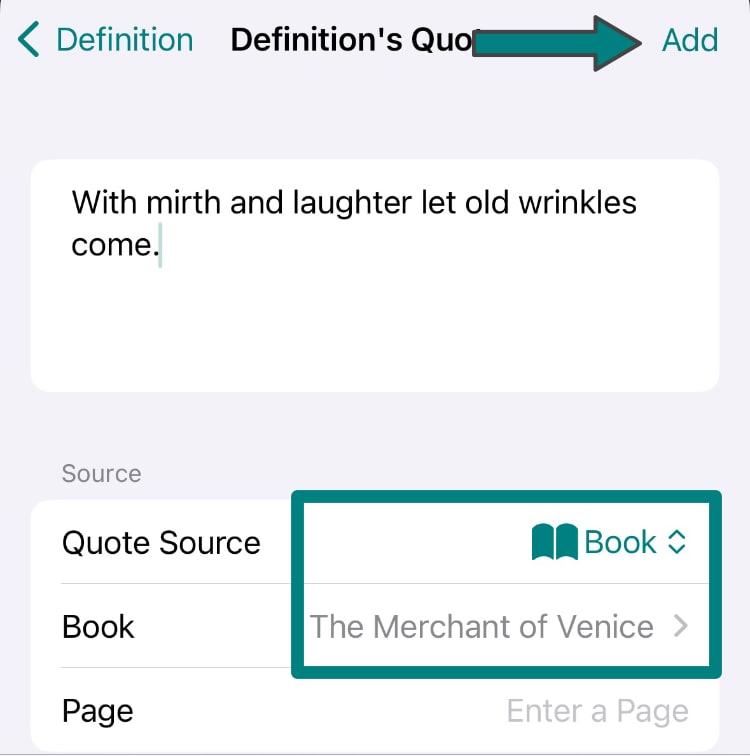
    Associate a quote to a definition

    Add a quote (example) to a definition.
    NOTE: This is the only way to definitively associate a vocabulary entry to a book - via this quote from the book.
    IMPORTANT: You must tap the top-right button "Add" to confirm your quote (example) and your definition.


V2. I have added a vocabulary entry to a book, but it doesn't appear.

Did you add a vocabulary entry from within a book (rather than from the Vocabulary bottom main tab)? And now you don't see your entry listed on the book's list?
It's probably because the vocabulary entry doesn't have an associated quote to the book.
To fix this, follow these steps:

  1. Edit a vocabulary entry.
  2. Tap on an existing definition (of the vocabulary) or add a new definition.
  3. Tap "Add Quote (Example)".
  4. On the "Quote Source" line, select "Book"
  5. On the "Book" line, select your target book.
  6. Finally save everything by tapping the top-right button "Add" then "Save".
You can find more details about adding a vocabulary entry on question V1.